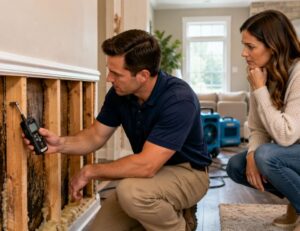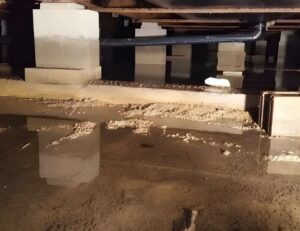
A basement can look “fine” and still be quietly taking on water. By the time you see a puddle, basement water damage may already be soaking insulation, softening drywall, and feeding mold behind the wall.
In Northern Michigan, winter thaws, snowmelt, and spring rains love to test foundations. The good news is you can catch early clues with a simple inspection, a few basic tools, and a clear plan for what to do next.
Why hidden basement water damage gets missed (and why it accelerates)
Water doesn’t always pour in like a broken pipe. Sometimes it creeps, wicks, and spreads like a paper towel pulling up a spill. Basement walls can hide moisture behind paneling, studs, or stored boxes, so the first “visible” sign might be warped trim or a musty smell that comes and goes.
Left alone, moisture can lead to:
- Mold growth in dark cavities, especially where air can’t circulate.
- Rot and corrosion on wood framing and metal fasteners.
- Foundation and finish damage, including spalling, peeling paint, and crumbling mortar.
The subtle signs of water inside basement walls
Musty odor that returns after you “clean”
If your basement smells earthy or stale, then disappears with a candle or cleaner, moisture may still be present. Odor that gets stronger after rain or a thaw is a classic hint.
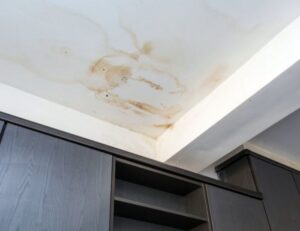
Paint bubbles, peeling, or “blistered” drywall
Moisture can push paint off the surface in small bubbles. Drywall may look slightly swollen near the bottom 6 to 18 inches, even if it feels “dry” to the touch.
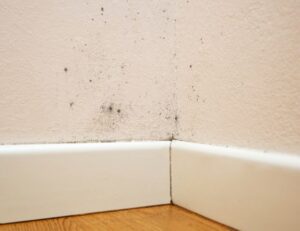
Efflorescence (white, chalky crust) on concrete or block
That white powder is mineral salt left behind when water moves through masonry and evaporates. It doesn’t always mean active leaking today, but it means water has traveled through that wall.
Rust lines, nails that stain, or metal that looks “sweaty”
Rust on corner bead, fasteners, or metal shelving can be your early alarm. Metal reacts fast in damp air, even before you see wet spots.
Baseboards separating or flooring edges curling
Finished basements often show damage at seams first. If trim is pulling away or LVP edges are lifting, moisture may be coming from behind the wall, not from the middle of the room.
Cold, damp-feeling patches you can’t explain
A wall section that always feels cooler can be a condensation hotspot. In winter, warm indoor air hits cold foundation materials and drops water like a glass of ice water on a humid day.
A 30-minute DIY inspection you can do today
You don’t need to open walls right away. Start with checks that give you strong clues.
Grab:
- A bright flashlight
- Nitrile gloves
- Painter’s tape and a marker
- A hygrometer (humidity meter), if you have one
- A moisture meter (optional, but helpful)
Step 1: Map the “risk line”
Walk the perimeter and look from floor to waist height. Mark anything suspicious with painter’s tape: stains, peeling paint, rusty corners, soft trim, or white crust on block.
Step 2: Check humidity like it’s a smoke alarm
As a rule of thumb, aim to keep basement relative humidity (RH) under 50%, and many homeowners find 40% to 50% is a sweet spot for comfort and mold control. If your hygrometer reads 55% to 60% or higher for long stretches, that’s a moisture problem even if walls look normal.
Step 3: Use the “hand and tissue” test
Press a dry tissue to the wall where you placed tape. If it picks up dampness or cool moisture, note the date and weather. Do the same on a known dry interior wall to compare.
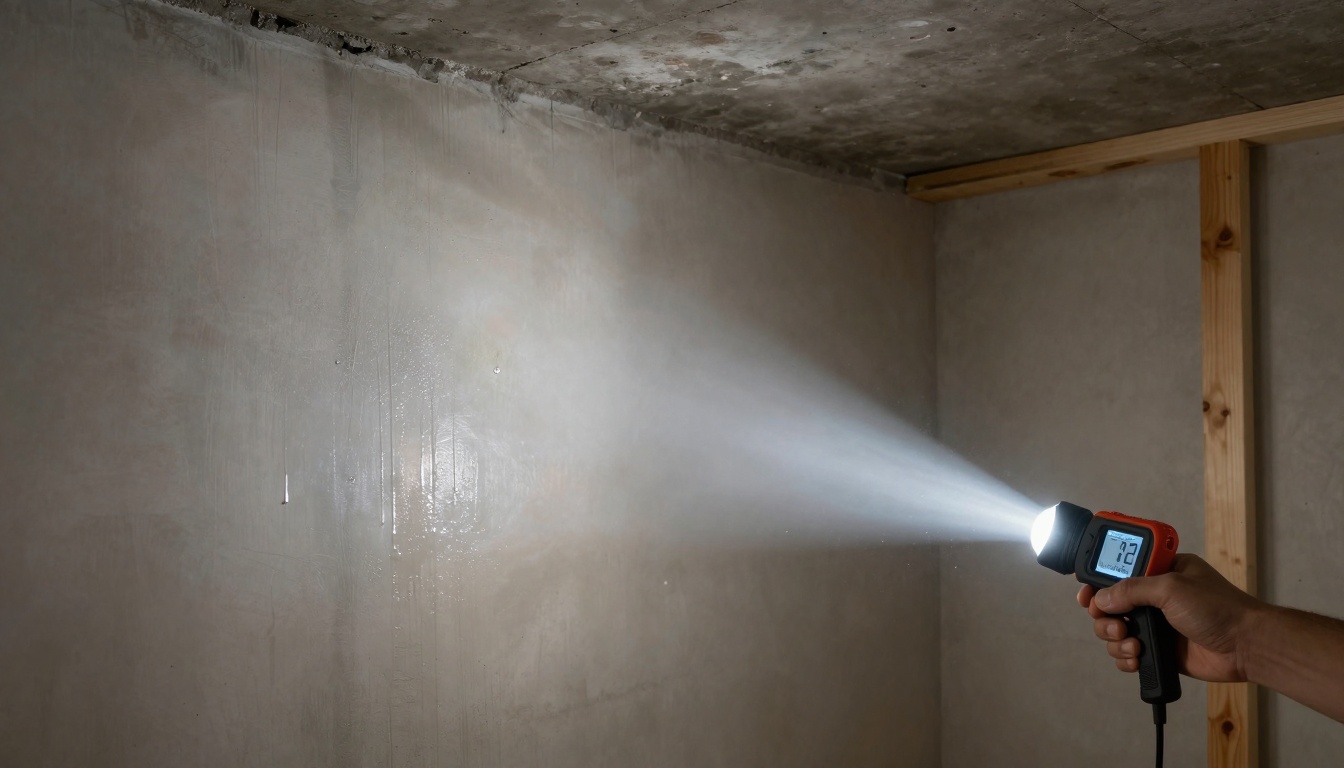
Step 4: Moisture meter spot-check (simple interpretation)
Moisture meters vary, so don’t obsess over one number. Use them to compare areas.
- Baseline first: Test a spot you’re confident is dry.
- Scan low areas: Check along the bottom of walls, behind furniture, and near windows.
- Rule of thumb: If readings are consistently much higher than your baseline in one section, that area deserves attention.
Step 5: The plastic square test for concrete walls (overnight)
Tape a 2-foot by 2-foot sheet of plastic tightly to the wall. Check it the next day.
- Moisture behind the plastic can point to water moving through the wall.
- Moisture on the room side can point to condensation from humid air.
Safety warnings: electricity and possible mold exposure
Basements mix water, wiring, and confined air, so be cautious.
- Electrical hazard: If you have standing water, wet outlets, sparking, or a burning smell, stay out. Shut off power if you can do so safely, then call a qualified electrician and restoration pros.
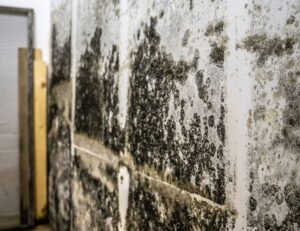
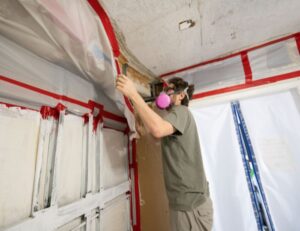
- Mold caution: Don’t scrape or dry-brush fuzzy growth. Disturbing it can spread particles through the air. If you suspect hidden growth, limit time in the area and improve ventilation without blowing air directly at suspect spots.
If you see widespread growth or strong musty odor from wall cavities, it may be time for Mold Removal and Remediation in Traverse City by trained teams with proper containment.
Decision tree: what to do next based on what you find
Use this as your next-step cheat sheet:
| What you found | Likely issue | Do this next |
|---|---|---|
| Damp smell, RH over 55% for days, no visible leaks | Humidity or condensation | Run a dehumidifier, target under 50% RH, re-check in 48 hours |
| Wet spots after rain or snowmelt | Exterior water entry | Check gutters, downspouts, grading, then monitor with tape marks |
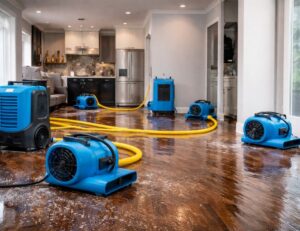
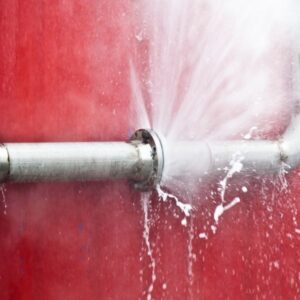
| Active dripping, soaked drywall, or wet insulation | Ongoing leak | Stop the water source if possible, start drying, call a pro |
| Standing water, sewage smell, or wet electrical areas | High hazard | Avoid contact, shut off power if safe, call professionals immediately |
| Visible mold covering more than about 10 sq ft, or recurring growth | Hidden moisture source | Don’t disturb it, schedule professional assessment |
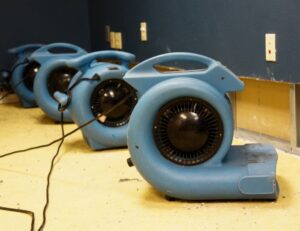
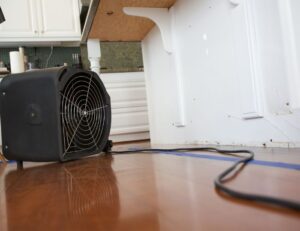
When you’re ready for professional help, start with professional water damage restoration services and ask what equipment they’ll use to find moisture inside walls (thermal imaging, meters, and drying logs).
Local note for homeowners: if your project needs WATER DAMAGE RESTORATION IN Traverse City, fast drying matters in winter because closed-up homes can trap moisture for weeks. And if wet wiring triggers a short or smoke event, you may also need FIRE DAMAGE RESTORATION IN Traverse City A as part of the larger recovery.
For urgent situations or to book an inspection, use https://driliferestoration.com/contact/.
Documenting basement water damage for insurance (without slowing down cleanup)
Good photos can save hours later. Document first, then start safe drying.
Quick documentation checklist:
- Take wide shots of each wall, then close-ups of stains, peeling, cracks, and damaged items.
- Record the date, weather conditions, and where water appeared first.
- Save receipts for fans, dehumidifiers, shop vac rentals, and temporary repairs.
- If you used a moisture meter, write down readings and locations (even a simple phone note helps).
If you want to see what other local homeowners say about response and results, read customer reviews of water damage restoration.
Reduce the odds of this happening again
Hidden basement water damage often comes back unless you fix the “why,” not just the wet materials.
- Gutters and downspouts: Clean them, then extend downspouts so water discharges well away from the foundation.
- Grading: Soil should slope away from the house so water doesn’t pool at the wall.
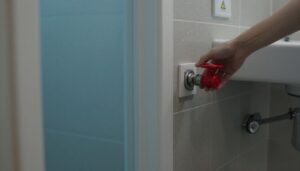
- Sump pump maintenance: Test it before spring melt. Pour water in the pit to confirm it turns on and drains. Consider a battery backup if outages are common.
- Dehumidification: Run a basement dehumidifier during humid months, and keep RH under 50%.
- Storage habits: Keep boxes and furniture a few inches off the floor and away from exterior walls so you can spot changes early.
Conclusion
Hidden basement water damage is rarely dramatic at first, but it moves fast once it finds a path. Watch for musty odor, peeling finishes, white mineral deposits, and humidity that won’t come down. Confirm what you can safely, document it well, then act before moisture turns into mold or structural repairs. If your findings point to a real leak or contaminated water, bring in qualified help and get the drying plan right the first time.